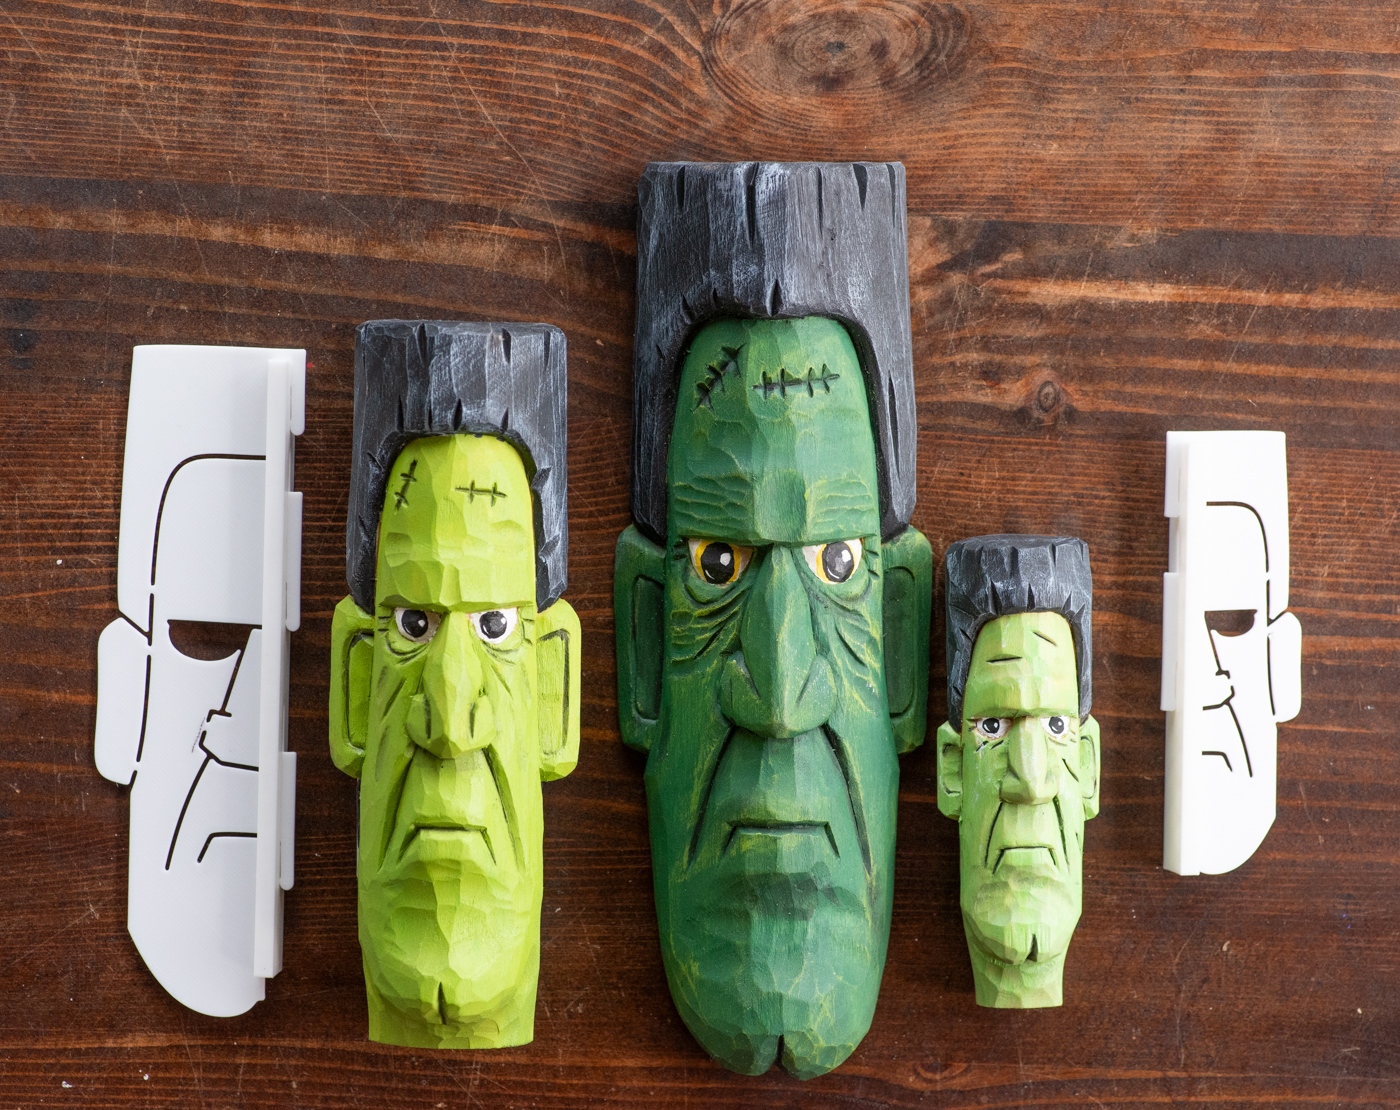
Looking for a fun Halloween wood carving project? In this tutorial, you'll learn how to carve a classic Frankenstein-inspired monster face from a simple block of wood.
The project begins by using a Frankenstein wood carving stencil to establish the main facial proportions before carving. This gives you a consistent starting point so you can spend less time drawing and more time shaping the character.
Follow along with the video above while using this written guide as a reference for the main steps, tools, and carving techniques used to create the finished Frankenstein carving.
Tools and Materials
Wood
A soft carving wood such as basswood works very well for this project. It cuts cleanly, has a fairly even grain, and makes it easier to shape facial features.
The stencil is designed for:
It wraps around the corner of the wood, helping create a face with more depth than a pattern drawn only on the front surface.
Layout
- Frankenstein wood carving stencil
- Mechanical pencil or sharp pencil
Carving Tools
The exact tools can vary, but the project can be completed with a combination of:
- Rotary or flex-shaft tool
- Fine abrasive wheels for cleanup
You do not necessarily need every tool listed above. A sharp carving knife and V-tool can accomplish much of the basic shaping.
Always use proper carving protection and work with sharp, controlled tools.
Step 1: Transfer the Pattern
Position the stencil securely over the corner of your wood block.
Use a pencil to trace the main reference lines onto the wood. Take your time here, since a clean layout gives you useful landmarks as you begin removing material.
The stencil provides the starting proportions, but the final expression and character will come from the carving itself.
Step 2: Rough Out the Head
Begin by removing larger amounts of wood around the basic shape of the face.
At this stage, focus on the major forms:
Avoid worrying about wrinkles, eyes, scars, or other small details yet.
A good approach is to leave the areas you want to project forward, such as the nose and brow, while gradually removing material around them.
Step 3: Establish the Brow and Eyes
The heavy brow is one of the features that gives this Frankenstein carving its strong expression.
Begin lowering the areas around the brow while leaving enough material for the forehead and nose.
Use controlled knife or V-tool cuts to separate the forehead, brow ridge, and eye area.
Do not make the eyes too deep too quickly. As the brow becomes more pronounced, the eyes will naturally appear more recessed.
Step 4: Shape the Nose
Use the traced lines as a guide for the width and position of the nose.
Gradually remove wood from both sides so the nose begins to project outward from the face.
Try to think of the nose as a three-dimensional shape rather than a flat outline.
Rotate the carving often and check it from different angles. This helps keep both sides balanced while still allowing the face to develop its own character.
Step 5: Shape the Cheeks and Mouth
Once the nose is established, begin forming the cheeks and lower part of the face.
Remove material around the mouth to create separation between the lips and chin.
A V-tool can help establish the mouth line before refining the surrounding areas with a knife or gouge.
Frankenstein is a caricature-style character, so the features do not need to be perfectly symmetrical. Slight exaggeration can make the finished carving more expressive.
Step 6: Refine the Facial Features
With the larger shapes established, begin adding smaller details.
Use a detail knife, V-tool, or small veiner to define:
Small cuts can make a big difference in the expression.
Every so often, hold the carving farther away and look at the entire face. This makes it easier to spot areas that need more depth or balance.
Step 7: Add Character
Once the basic anatomy is in place, begin exaggerating the features that give the monster personality.
You might create:
The pattern gives you a starting point, but the final Frankenstein carving can look completely different depending on how you shape these features.
Step 8: Clean Up the Carving
After the main carving is finished, inspect the surface for rough fibers or transitions that need additional work.
A sharp detail knife can clean up fuzzy areas and refine smaller shapes.
A rotary or flex-shaft tool with fine abrasives can also help smooth difficult areas, but use light pressure. These tools can remove wood very quickly around smaller features such as the nose and mouth.
Step 9: Add the Final Details
Finish the carving by adding any final wrinkles, texture, creases, or accent cuts.
Remove any remaining pencil marks that are no longer needed.
Try not to add detail simply to fill empty space. Strong facial forms usually have more impact than covering every part of the carving with small lines.
Once you're happy with the result, the Frankenstein monster is ready for your preferred paint or finish.
Tips for a Better Frankenstein Carving
Keep Your Tools Sharp
Sharp tools create cleaner cuts and require less force. If the wood begins tearing instead of slicing cleanly, check your edge.
Pay Attention to the Grain
If a cut begins lifting or tearing fibers, try approaching the area from another direction.
Work From Large Shapes to Small Details
Establish the head, brow, nose, cheeks, mouth, and chin before carving wrinkles or other small features.
Don't Chase Perfect Symmetry
Caricature faces do not need to be perfectly symmetrical. Small differences can give the finished carving more personality.
Remove Wood Gradually
If you are unsure whether an area needs to go deeper, leave it temporarily. You can always remove more wood later.
The Finished Frankenstein Carving
The final result is a bold Halloween character with a heavy brow, exaggerated facial features, and plenty of room for your own carving style.
Once you've completed the basic Frankenstein design, you can experiment with deeper wrinkles, different expressions, paint, or finishing techniques to make each carving unique.
This is a fun seasonal project for practicing face carving while creating a recognizable Halloween character.